 Skip to content
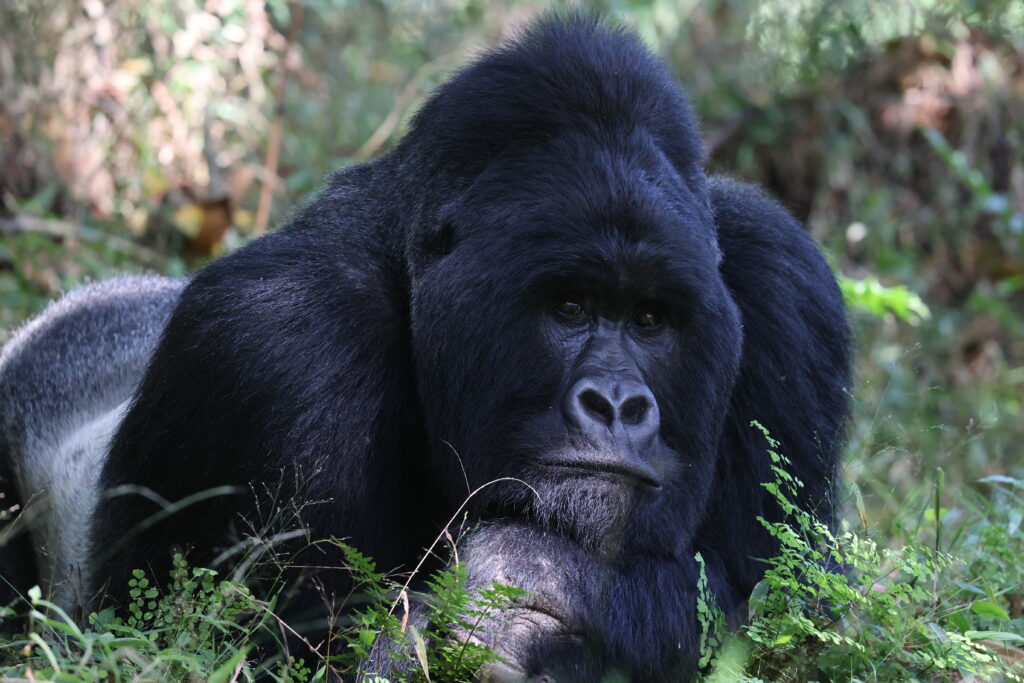
This Gorilla Safari Photography Guide Rwanda and Uganda explains how to prepare for a photographic gorilla trek in Volcanoes National Park, Bwindi Impenetrable National Park, and Mgahinga Gorilla National Park. It covers cameras, lenses, exposure settings, autofocus, composition, equipment protection, trekking preparation, permits, ethical photography, and sample itineraries.
Photographing a mountain gorilla in its natural habitat is one of Africa’s most powerful wildlife experiences. The forest is alive with shifting light, tangled vegetation, dripping leaves, and quiet movement. A silverback may sit thoughtfully beneath the canopy, a mother may carry an infant through dense foliage, or a young gorilla may climb through branches before disappearing into the forest.
Capturing those moments, however, requires more than an expensive camera. Gorilla habitats are dark, humid, physically demanding, and photographically unpredictable. Visitors normally have limited time with a habituated gorilla family, flash photography is prohibited, and the wellbeing of the animals always comes before getting a photograph.
Whether you use a professional mirrorless system, a DSLR, a compact camera, or a smartphone, careful preparation will help you return with better photographs while respecting the gorillas and their forest environment.
Why Photograph Mountain Gorillas in Rwanda and Uganda?
Mountain gorillas are found in the forested highlands shared by Rwanda, Uganda, and the Democratic Republic of the Congo. Rwanda and Uganda provide established trekking systems, trained park personnel, habituated gorilla families, accommodation, and safari infrastructure.
Unlike traditional wildlife photography from a safari vehicle, gorilla photography happens on foot. Participants walk through mountain forest with park guides and trackers before spending a regulated period observing an allocated gorilla family.
Several characteristics make the experience photographically distinctive.
Close but controlled encounters
Gorilla trekking provides an opportunity to observe habituated gorillas from a regulated distance. The Rwanda Development Board instructs visitors to maintain seven metres from the gorillas, keep their voices low, and follow the park team’s directions. Standard viewing time is limited to one hour, and ordinary groups contain no more than eight visitors. Official Rwanda gorilla rules.
Gorillas may occasionally move closer on their own. Visitors must not approach or touch them. Follow the ranger’s instructions and move only when directed.
Expressive subjects
Gorillas communicate through posture, facial expression, movement, and social interaction. Their behavior creates opportunities for portraits, environmental photographs, family interactions, and visual storytelling.
The most meaningful image may not be a silverback looking directly toward the camera. A quiet photograph of a gorilla feeding, resting, grooming, or disappearing into the vegetation can communicate more about life in the forest.
Challenging natural light
The forest canopy filters sunlight and creates uneven illumination. One gorilla may sit in shadow while bright leaves dominate the background. Clouds, rain, and moving vegetation can alter exposure within seconds.
These conditions reward photographers who understand their equipment before the trek.
Limited photography time
Once the gorilla family is located, ordinary trekking visits generally provide one regulated hour. That time passes quickly.
The photographer must balance image-making with observation. Constantly changing menus, lenses, or complicated accessories can consume much of the encounter.
Gorilla Safari Photography Guide Rwanda and Uganda: Choosing a Destination
Both countries offer outstanding photographic possibilities, but their logistics, permit prices, trekking sectors, accommodation, and landscapes differ.
Gorilla Photography in Rwanda
Rwanda’s gorilla trekking takes place in Volcanoes National Park in the northwestern part of the country. The park is accessible from Kigali, making Rwanda particularly suitable for short, high-quality gorilla photography tours.
Advantages of Rwanda for photographers
- Relatively convenient access from Kigali
- Wide selection of accommodation near the park
- Easy combination with Kigali and Lake Kivu
- Strong luxury-safari infrastructure
- Opportunities for golden monkey photography
- Views of the Virunga volcanoes
- Practical for short pre- or post-safari extensions
- Easy combination with Akagera National Park
Rwanda gorilla permit
Visit Rwanda currently lists the standard gorilla permit at USD 1,500 per person per trek. The official minimum participation age is 15. Prices and booking conditions should always be reconfirmed for the intended travel date. Visit Rwanda gorilla information.
Photographic environment
Volcanoes National Park contains bamboo zones, montane vegetation, dense undergrowth, and changing mountain light. Depending on the family’s location, photographers may encounter relatively open bamboo or dark, layered vegetation.
No tour operator can guarantee the gorillas will be sitting in clear light. Natural movement and habitat determine the conditions on the day.
Repeating the trek in Rwanda
Serious photographers may reserve two gorilla treks on separate days. A second trek offers another chance to experience different light, weather, behavior, terrain, and possibly a different family.
Two treks also reduce the pressure to capture every desired image during one hour.
Gorilla Photography in Uganda
Uganda offers mountain gorilla trekking in Bwindi Impenetrable National Park and Mgahinga Gorilla National Park.
Bwindi is divided into several trekking sectors, commonly including Buhoma, Ruhija, Rushaga, and Nkuringo. The sector determines where you should stay and report for the morning briefing. Uganda Wildlife Authority’s gorilla-tracking overview.
Advantages of Uganda for photographers
- Multiple Bwindi trekking sectors
- Choice of forest environments and accommodation
- Gorilla trekking in both Bwindi and Mgahinga
- Easy combination with chimpanzees and savannah wildlife
- Gorilla habituation opportunities when available
- Attractive longer safari circuits
- A lower standard permit price than Rwanda
- Excellent opportunities for forest and community photography
Uganda gorilla permit
The standard foreign non-resident gorilla permit is commonly listed at USD 800 per person per trek. Rates can change, so travelers should request confirmation from the Uganda Wildlife Authority or a recognized tour operator before booking.
Uganda may also offer different rates for foreign residents, East African citizens, or other eligible categories. Proof of eligibility is normally required.
Gorilla habituation experience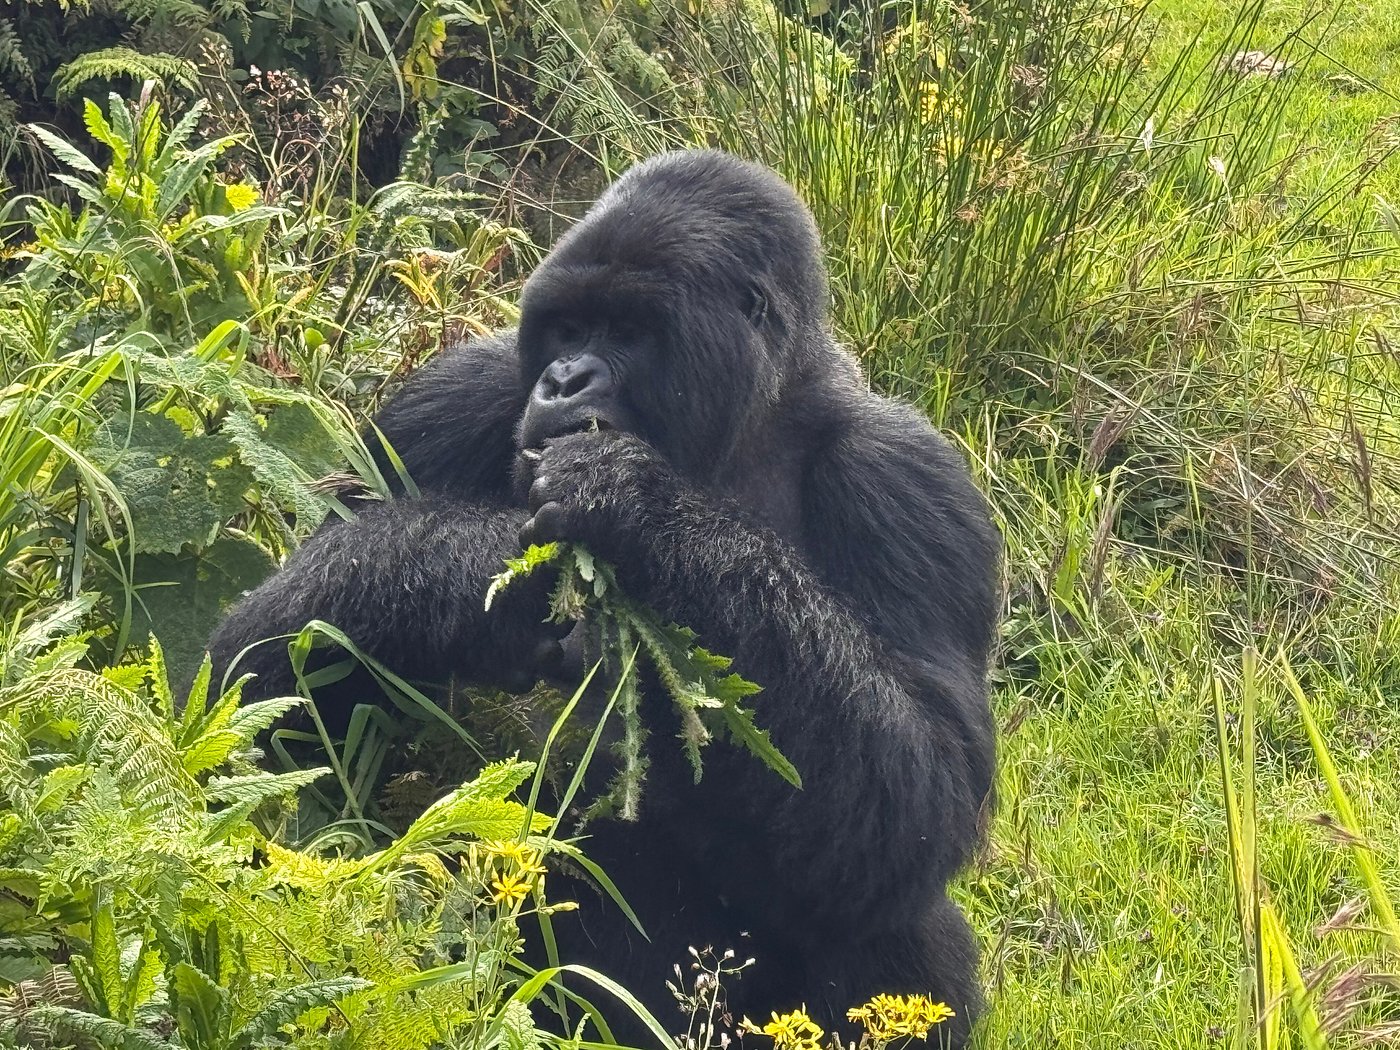
Uganda is known for offering a gorilla habituation experience in selected areas when available. It provides more time with a gorilla group undergoing habituation than an ordinary one-hour trek.
This can be highly attractive to photographers, but it should not be misunderstood as a private photo session. Participants must still follow the park’s rules, respect the research and habituation process, and work around natural gorilla behavior.
Availability, group size, permit price, and current operating procedures must be confirmed when booking.
Bwindi photography conditions
Bwindi’s name reflects the density of its forest. Photographers may work among layered leaves, vines, slopes, and deep shade.
These conditions can be technically demanding, but they also produce atmospheric images that show the gorillas as part of a complex rainforest ecosystem.
Mgahinga photography conditions
Mgahinga lies within the Virunga mountain region. It can offer bamboo, volcanic scenery, and golden monkey photography in addition to gorilla trekking.
Permit availability is more limited, so advance planning is important.
Rwanda or Uganda for Gorilla Photography?
The better choice depends on the photographer’s priorities.
| Consideration | Rwanda | Uganda |
|---|---|---|
| Main location | Volcanoes National Park | Bwindi and Mgahinga |
| Standard permit | USD 1,500 | Commonly USD 800 |
| Access | Convenient from Kigali | Longer transfers or domestic flights |
| Short safari suitability | Excellent | Possible, especially through Kigali or domestic flights |
| Trekking sectors | One principal park region | Several Bwindi sectors plus Mgahinga |
| Luxury accommodation | Extensive | Strong and varied |
| Habituation experience | Standard trek normally emphasized | Available in selected circumstances |
| Wider safari combination | Akagera, Nyungwe and Lake Kivu | Queen Elizabeth, Kibale, Lake Mburo and Murchison Falls |
| Golden monkeys | Volcanoes National Park | Mgahinga |
| Best choice for | Efficient premium itineraries | Longer, varied photography tours |
Travelers do not necessarily need to choose only one country. A Rwanda–Uganda itinerary can include separate gorilla treks and provide two contrasting photographic environments.
Best Cameras for Gorilla Photography
The best camera is one you can operate quickly and confidently. Forest conditions are not an ideal place to learn a complicated system for the first time.
Mirrorless cameras
Modern mirrorless cameras are excellent for gorilla photography because many provide:
- Strong high-ISO performance
- Accurate autofocus
- Subject or animal detection
- Electronic viewfinders
- Silent or quiet shooting
- In-body stabilization
- High frame rates
- Compact bodies compared with some DSLRs
Confirm whether your animal-detection mode recognizes primates reliably. Test it before travel rather than assuming it will always find the eye.
DSLR cameras
A DSLR remains a capable choice. Advantages may include:
- Familiar controls
- Strong battery life
- Optical viewfinder
- Wide lens availability
- Reliable autofocus
- Durable construction
Do not replace a familiar DSLR immediately before departure simply because newer equipment exists. Familiarity often produces better results than unfamiliar technology.
Crop-sensor cameras
APS-C and Micro Four Thirds cameras can provide excellent images while reducing equipment size and cost. Their apparent reach can be helpful for portraits, although low-light performance varies by model.
Full-frame cameras
Full-frame cameras are popular for their high-ISO performance, dynamic range, and control over depth of field. They are not essential, but they can be advantageous in dark forest conditions.
Compact cameras
A high-quality compact camera can work well if it has:
- A reasonably bright lens
- Fast autofocus
- RAW capture
- Image stabilization
- Manual or semi-automatic controls
- Useful zoom range
Smartphones
Modern smartphones can capture good wide environmental images and video in suitable light. However, digital zoom, limited low-light performance, and difficulty isolating subjects can reduce image quality.
Use the main optical camera rather than excessive digital zoom. Clean the lens before the trek and deactivate the flash.
Best Lenses for Gorilla Photography
Lens choice affects image quality, flexibility, equipment weight, and the number of lens changes required in a wet environment.
70–200mm zoom
A 70–200mm lens is one of the most useful options for gorilla photography. It supports:
- Head-and-shoulder portraits
- Full-body images
- Parent-and-infant interactions
- Moderate environmental compositions
- Fast reframing when gorillas move
A version with an f/2.8 maximum aperture gathers more light but is heavier and more expensive. An f/4 version is lighter and can still perform well with modern high-ISO cameras.
100–400mm zoom
A 100–400mm lens provides greater reach for portraits and partially obscured animals. However, its slower maximum aperture can require higher ISO settings in deep shade.
The long end may also be less useful if a gorilla is relatively close or vegetation restricts the field of view.
24–70mm zoom
A 24–70mm lens is valuable for wider scenes, forest context, trekking photographs, people, landscapes, and gorillas positioned within their environment.
It may not provide enough reach as the only lens, but it is an excellent second option.
24–120mm or 24–105mm zoom
These lenses offer useful flexibility for photographers who want to carry a single camera and minimize equipment. They support environmental images, group interactions, and moderate portraits.
70–300mm zoom
A 70–300mm can provide a practical balance of reach, size, and price. Performance depends on its autofocus, stabilization, and maximum aperture.
Prime lenses
Fast primes can create beautiful low-light images, but fixed focal lengths reduce flexibility when movement is restricted.
Changing your position is not always possible because visitors must remain where the rangers direct them. A zoom is therefore normally more practical.
Super-telephoto lenses
A very large 400mm, 500mm, or 600mm prime is usually unnecessary for standard gorilla trekking. It can be difficult to carry through forest terrain and may provide too narrow a field of view.
Long lenses also make it harder to react when a gorilla changes position.
One Camera or Two?
A two-camera setup can be useful for experienced photographers:
- One body with a 24–70mm lens
- One body with a 70–200mm or 100–400mm lens
This reduces lens changes and provides immediate access to wide and close compositions.
However, carrying two cameras adds weight and complexity. A single body with a flexible zoom may be more appropriate for difficult terrain.
A porter can help carry safely packed equipment during the hike, but the photographer should take responsibility for the cameras during the actual encounter.
Recommended Camera Settings for Gorilla Photography
There is no single setting that works in every situation. Light and movement can change rapidly.
The goal is to maintain a sufficiently fast shutter speed, appropriate depth of field, and accurate focus while allowing the ISO to rise when necessary.
Gorilla Safari Photography Guide Rwanda and Uganda: Exposure Modes
Aperture priority
Aperture priority is useful when the photographer wants to control depth of field while allowing the camera to select shutter speed.
However, the camera may choose a shutter speed that is too slow when the forest becomes dark. Use minimum shutter-speed controls or monitor the shutter speed constantly.
Manual exposure with Auto ISO
Manual mode combined with Auto ISO is one of the most effective methods for changing forest light.
The photographer selects:
- Shutter speed
- Aperture
- Maximum acceptable ISO
The camera then adjusts ISO as the light changes.
This approach maintains control over motion and depth of field.
Shutter priority
Shutter priority can help when subject movement is the primary concern. The camera chooses the aperture, but the lens may reach its maximum opening in low light.
Full manual exposure
Experienced photographers may use full manual settings when the light is stable. Forest light frequently changes, so exposure should be checked regularly.
Choosing the Right Shutter Speed
Gorillas may appear still but make small head, eye, hand, and body movements. Photographer movement also affects sharpness.
Useful starting points include:
- Resting adult: approximately 1/250 to 1/400 second
- Slow feeding or grooming: approximately 1/400 to 1/640 second
- Moving gorilla: approximately 1/800 second or faster
- Active infant or juvenile: approximately 1/1000 second or faster
- Wide environmental scene: potentially slower if both subject and camera are stable
These are starting points rather than strict rules.
Image stabilization reduces camera shake but does not stop the gorilla’s movement. A stabilized lens cannot make an active juvenile sharp at an excessively slow shutter speed.
Selecting an Aperture
A wide aperture allows more light to reach the sensor, but depth of field becomes shallower.
Using f/2.8
An aperture of f/2.8 is useful for:
- Individual portraits
- Dark conditions
- Isolating a face
- Softening a distracting background
Focus must be precise because the eye or face can fall outside the sharp area.
Using f/4
F/4 offers a useful balance between light and depth of field. It can work well for portraits and single gorillas.
Using f/5.6 to f/8
A smaller aperture may be appropriate when:
- Two gorillas need to be sharp
- Photographing a mother and infant
- Capturing a broader environmental scene
- Sufficient light is available
- Using a higher ISO is acceptable
Do not automatically use a very small aperture in the dark forest. It may force the shutter speed too low.
ISO Settings in the Gorilla Forest
High ISO is often necessary. A sharp image with some visible noise is usually preferable to a blurred photograph captured at a low ISO.
Depending on the camera and light, photographers may use:
- ISO 800 in relatively bright conditions
- ISO 1600 under moderate forest shade
- ISO 3200 in darker areas
- ISO 6400 or higher when necessary to preserve shutter speed
Test your camera before the trip to understand how it performs at different ISO levels. Modern noise-reduction software can improve high-ISO files, but it cannot fully repair missed focus or motion blur.
Autofocus Settings for Gorilla Photography
Continuous autofocus
Use continuous autofocus—often called AF-C or AI Servo—when gorillas are moving or changing posture.
Single autofocus
Single autofocus can work for a resting subject, but continuous mode provides more flexibility.
Eye-detection autofocus
Animal eye detection can be useful, but dark eyes, black fur, leaves, and shadows may confuse the camera.
Confirm focus in the viewfinder. Be prepared to switch to a smaller focus area if the camera selects vegetation instead of the gorilla.
Flexible spot or small-area autofocus
A small or medium focus area helps place focus on the visible eye through gaps in leaves.
An extremely small point may be difficult to hold on a moving subject, while a large area may lock onto foreground vegetation.
Focus on the nearest eye
For a close portrait, focus on the eye nearest the camera. If the face is angled, use sufficient depth of field to keep both eyes acceptably sharp when possible.
Metering and Exposure Compensation
Dark gorilla fur surrounded by bright green leaves can confuse a camera’s meter.
The camera may brighten the gorilla excessively and overexpose the background, or it may preserve bright leaves and leave the face too dark.
Use the histogram and highlight warning rather than relying entirely on the image shown on the rear screen.
Exposure compensation
In aperture priority, exposure compensation allows rapid correction.
Test a small adjustment and review the histogram. There is no universal compensation value because light, camera metering, background, and subject position vary.
Protect important highlights
Bright leaves and patches of sky can overexpose easily. Some highlight clipping may be unavoidable, but protect important areas such as the gorilla’s face and surrounding habitat.
Expose for the face
The face and eyes usually carry the emotional importance of a portrait. Make sure they contain usable detail without producing an unnatural result.
RAW or JPEG?
RAW format
RAW files preserve greater flexibility for:
- Recovering shadow detail
- Correcting white balance
- Managing highlights
- Reducing noise
- Adjusting contrast
- Fine-tuning color
RAW is strongly recommended for serious photography.
JPEG format
JPEG files require less storage and are immediately shareable. They provide less adjustment flexibility.
RAW plus JPEG
Recording both formats offers convenience and editing freedom, but it consumes more card space. Carry sufficient high-quality memory cards.
White Balance in the Forest
Automatic white balance often works reasonably well, but dense vegetation can create a strong green cast.
Options include:
- Auto white balance
- Daylight
- Cloudy
- A custom Kelvin value
- RAW capture followed by careful correction
Avoid removing every trace of green. The objective is a natural forest atmosphere, not a neutral studio portrait.
Pay particular attention to the skin tones on a gorilla’s face, hands, and ears.
Burst Mode and Silent Shutter
Burst shooting
A moderate burst can capture:
- Changing expressions
- A glance toward the camera
- Infant movement
- Grooming interactions
- A yawn
- A silverback changing posture
Avoid holding the shutter continuously throughout the encounter. This creates excessive files and distracts from careful observation.
Silent shooting
A silent electronic shutter can reduce camera noise. However, some electronic shutters can create distortion with fast movement or banding under certain artificial lights. Forest conditions are usually natural, but test the camera beforehand.
Even when using a quiet camera, move slowly and follow the guide’s instructions.
Turn Off the Flash Before the Trek
Flash photography is not permitted around mountain gorillas.
Disable every flash function before entering the forest, including:
- Built-in flash
- Automatic flash
- Red-eye reduction
- Autofocus-assist lights
- External flash units
- Bright continuous video lights
Do not wait until the gorillas are found. Configure the camera at the lodge and check it again during the briefing.
If using a smartphone, confirm that the flash is set to off, not automatic.
Composition Tips for Gorilla Photography
Technical accuracy is only part of a successful image. Composition determines how the viewer experiences the moment.
Photograph at eye level when permitted
Eye-level portraits can create a strong sense of connection. Do not move away from the group or lower yourself without following ranger instructions.
The terrain may make a perfectly level angle impossible. Safety and park rules come first.
Leave space in the direction of movement
When a gorilla is looking or moving to one side, leaving space in that direction can make the composition feel more natural.
Include the forest
Tight portraits are compelling, but environmental photographs tell a broader story.
Include:
- Bamboo
- Ferns
- Forest layers
- Rain
- Mist
- Tree trunks
- Volcano slopes
- Light passing through leaves
A complete photographic story should show both the animal and its habitat.
Look for natural framing
Leaves, branches, and vines can frame the gorilla. Foreground vegetation may add depth when it does not obscure the important parts of the image.
Capture relationships
Photographs of social behavior can be more meaningful than isolated portraits.
Look for:
- Mother and infant
- Grooming
- Resting family members
- Juvenile play
- Feeding
- Protective postures
- Subtle glances between gorillas
Never encourage or attempt to influence behavior.
Include hands and feet
Gorilla hands, feet, posture, and feeding gestures provide valuable behavioral details. Avoid cropping limbs awkwardly unless creating a deliberate close study.
Use vertical and horizontal framing
Vertical compositions suit portraits and tall forest elements. Horizontal frames work well for family interactions and habitat.
Capture both orientations when time and behavior allow.
Watch the background
Bright leaves, white sky, and tangled branches can distract from the subject. Adjust your framing only when the ranger permits movement.
Sometimes waiting for the gorilla to change position is more effective than moving yourself.
Photographing Black Fur in Difficult Light
Mountain gorillas have dark fur that can lose texture in underexposed images.
Preserve fur detail
Use the histogram to make sure the image is not unnecessarily dark. Expose carefully without allowing bright areas to dominate.
Look for side light
Soft side light can reveal the shape and texture of the fur. Strong front light may flatten the subject, while severe backlighting can make exposure more difficult.
Watch the face
The eyes and facial features are often darker than surrounding vegetation. Review selected images at high magnification to verify focus and exposure.
Avoid excessive editing
Lifting shadows too aggressively can introduce noise, unnatural colors, and flat contrast. Preserve a believable sense of forest light.
Photographing Gorillas in Rain
Rain is a normal part of the gorilla habitat and can create excellent images.
Droplets on fur, wet leaves, fog, and soft light can strengthen the atmosphere. Preparation is essential, however.
Protect the camera
Use:
- A proper rain cover
- Lens hood
- Dry bag
- Absorbent cloth
- Microfiber lens cloth
- Sealed camera bag
- Silica gel packs
A thin plastic cover can provide emergency protection, but it should not obstruct controls or create litter.
Avoid changing lenses
Changing lenses in rain or high humidity increases the risk of moisture and debris reaching the sensor. Use one flexible zoom or two protected camera bodies.
Keep the front element clear
A lens hood helps reduce water on the front element. Check for droplets periodically without spending the entire encounter cleaning the lens.
Do not place equipment on wet ground
Keep bags closed and use the porter’s assistance where appropriate.
Photographing Gorillas With a Smartphone
A smartphone can produce memorable images when used within its limitations.
Clean the lens
Fingerprints reduce contrast and sharpness, especially in backlit conditions.
Turn off flash
Do this before the encounter and check that video lights are also disabled.
Avoid excessive digital zoom
Digital zoom usually reduces image quality. Use the phone’s genuine optical camera options when available.
Stabilize the phone
Hold it with both hands and keep your elbows close to your body. Do not use a large accessory that interferes with other trekkers or park procedures.
Tap to focus
Tap the gorilla’s face or eye and adjust exposure when the interface permits.
Record short video clips
Short, steady clips are often more watchable than long recordings with constant movement. Do not spend the entire hour viewing the experience through the screen.
Respect other participants
Hold the phone close to your body and avoid extending it in front of another visitor’s camera or face.
Video During a Gorilla Trek
Video can capture movement, forest sounds, feeding, and social behavior.
Recommended considerations include:
- Turn off recording lights.
- Use quiet camera operation.
- Select settings before reaching the gorillas.
- Stabilize without blocking others.
- Record short intentional sequences.
- Avoid rapid panning.
- Capture natural ambient sound.
- Do not request that guides or trackers manipulate wildlife.
- Follow any commercial-filming restrictions.
Professional productions may require separate filming authorization. A standard tourist permit should not be assumed to cover commercial production.
Ethical Rules in This Gorilla Safari Photography Guide Rwanda and Uganda
The welfare of the gorillas is more important than any photograph.
Maintain the required distance
Rwanda’s official booking portal states that visitors must maintain a distance of seven metres. Follow the current instructions in either country.
If a gorilla approaches, remain calm and follow the ranger’s directions. Do not use the situation as an excuse to reach toward the animal or position yourself for a dramatic close-up.
Do not use flash
Flash is prohibited. It may disturb the animals and violates trekking rules.
Do not touch gorillas
Gorillas are wild animals and are vulnerable to human illnesses. Never attempt to touch them.
Keep voices low
Quiet behavior reduces disturbance and allows everyone to appreciate the experience.
Do not eat near gorillas
Follow all park instructions concerning food, drinks, and the disposal of waste.
Do not trek when ill
Visitors with a contagious illness may be prevented from trekking because gorillas can be vulnerable to human disease. Report symptoms honestly and follow the park authority’s decision.
Do not imitate gorilla sounds
Do not attempt to attract attention by copying calls, beating your chest, or making sudden movements.
Never request unethical positioning
Do not ask a guide, tracker, or porter to clear important habitat, pressure a gorilla, or move beyond authorized areas for a photograph.
Avoid location-sensitive posting
Consider whether immediately sharing precise location information could cause disturbance. Follow the advice of park authorities and conservation teams.
Be truthful in editing and captions
Do not claim that a standard trek was a wild, unregulated encounter. Accurate captions help the public understand responsible gorilla tourism.
Preparing Physically for a Photography Trek
Photography equipment adds weight to an already demanding forest walk.
Train before travel
Regular walking, hill practice, and general physical preparation can make the trek more comfortable. Training should be appropriate for your health and personal circumstances.
Hire a porter
A porter can carry a properly packed camera bag, water, and rainwear during the hike. This supports local livelihoods and helps conserve your energy for photography.
Use a walking stick
A walking stick can improve stability on muddy or uneven sections. Park teams often provide or arrange them.
Pack only essential equipment
A full professional kit may look impressive at the lodge but become a burden on steep forest trails.
Prioritize:
- Primary camera
- Flexible lens
- Optional second camera
- Spare batteries
- Memory cards
- Rain protection
- Lens cloth
- Water
- Required personal items
Leave unnecessary accessories at the lodge.
What to Wear for Gorilla Photography
Suitable clothing protects against rain, vegetation, mud, insects, and cool mountain conditions.
Pack:
- Sturdy waterproof hiking boots
- Long hiking trousers
- Long-sleeved shirt
- Waterproof jacket
- Comfortable hiking socks
- Gaiters when desired
- Gardening-style gloves
- Hat
- Light warm layer
- Small daypack
Avoid clothing that restricts movement. Bright colors are less practical than neutral outdoor clothing.
Tuck trousers into long socks when advised to reduce discomfort from insects and vegetation.
Camera Bag and Equipment Checklist
Primary photographic equipment
- Camera body
- General-purpose telephoto zoom
- Optional wide-to-standard zoom
- Optional second body
- Lens hoods
- Spare batteries
- High-quality memory cards
- Card wallet
- Rain covers
- Microfiber cloths
- Dry bag
Backup equipment
- Small backup camera or smartphone
- Additional charging cable
- Power bank
- Plug adapter
- Portable storage when required
Items to leave behind
The following are usually unnecessary or unsuitable during a standard trek:
- External flash
- Large lighting systems
- Heavy tripods
- Oversized hard cases
- Multiple rarely used lenses
- Drones
Drone use in or around protected areas requires authorization and should never be assumed to be permitted.
Battery and Memory-Card Management
Cold, humidity, screen use, autofocus, and video can increase battery consumption.
Before the trek
- Charge every battery.
- Format memory cards after backing them up.
- Synchronize camera clocks.
- Configure autofocus.
- Disable flash and assist lights.
- Set RAW or RAW plus JPEG.
- Program custom shooting modes.
- Clean lenses.
- Test both cameras.
- Pack batteries in a dry location.
During the encounter
Avoid deleting images. It wastes time and increases the risk of removing a valuable file.
After the trek
Create at least two copies before formatting cards. Keep the copies in separate physical locations where possible.
Do not rely on a single laptop, card, or portable drive.
Preparing Custom Camera Modes
Many cameras allow settings to be stored in custom modes.
A practical setup might include:
Custom mode 1: Resting portrait
- Manual exposure
- Auto ISO
- Approximately 1/400 second
- Wide or moderate aperture
- Continuous autofocus
- Eye detection
- Moderate burst rate
- RAW
Custom mode 2: Movement
- Manual exposure
- Auto ISO
- Approximately 1/1000 second
- Widest practical aperture
- Continuous autofocus
- Subject tracking
- High burst rate
- RAW
Custom mode 3: Environmental portrait
- Aperture priority or manual
- Moderate aperture
- Lower minimum shutter speed when appropriate
- Wider focal length
- Single-point or flexible-area focus
- RAW
These are starting configurations. Adapt them to the camera, lens, light, and personal technique.
Working With Your Ranger, Guide, and Porter
A successful photographic trek depends on cooperation.
Before trekking
Tell the safari operator that photography is a priority. The operator can plan:
- Appropriate luggage space
- Charging access
- Extra trekking day
- Porter arrangements
- Suitable accommodation
- Early arrival
- Equipment protection
- Rwanda–Uganda combinations
During the briefing
Listen carefully even if you have trekked before. Rules and field conditions may change.
During the encounter
The park ranger decides where participants may stand and move. Ask quietly before changing position.
Your photography should never delay the group’s response to a ranger instruction.
Respect equal access
Other visitors have also paid for the experience. Avoid occupying the best position throughout the hour or blocking another person’s view with a large lens.
Best Time of Year for Gorilla Photography
Gorilla trekking operates throughout the year, subject to park management and conditions.
Drier periods
June through September and approximately December through February are often considered drier periods.
Possible advantages include:
- Less muddy trails
- Easier hiking conditions
- Reduced equipment exposure to heavy rain
- More predictable road transfers
These months are popular, so permits and accommodation should be booked early.
Wetter periods
The wetter months can produce:
- Lush vegetation
- Soft light
- Atmospheric mist
- Rich forest colors
- Fewer visitors at some properties
- Dramatic rain photography
Challenges include mud, rain, slippery trails, and more complicated equipment protection.
There is no guaranteed dry trek
Mountain and rainforest weather can change rapidly. Carry rain protection in every season.
How Many Gorilla Treks Should a Photographer Book?
One trek can produce extraordinary images, but a second or third trek provides greater creative possibilities.
One trek
Suitable for:
- First-time visitors
- Short holidays
- General travelers
- Limited budgets
- Photographers combining gorillas with other wildlife
Two treks
Recommended for serious photographers because the second experience may provide:
- Different weather
- Different behavior
- Another family
- Improved technical confidence
- A second chance after difficult light
- More time to create environmental images
Three or more treks
Appropriate for specialist photographers, filmmakers, or guests building a substantial portfolio.
Permit and accommodation costs increase considerably, so the schedule should be carefully designed.
Rwanda Gorilla Photography Itinerary: Four Days
Day 1: Arrival in Kigali
A Universal Ventures Rwanda representative welcomes you at Kigali International Airport and transfers you to your hotel.
Your guide reviews the itinerary and checks that the essential photography equipment is ready.
Day 2: Kigali to Volcanoes National Park
Enjoy a private Kigali experience or travel directly to the Volcanoes region.
Arrive early enough to prepare batteries, memory cards, rain covers, and trekking clothing.
Day 3: Gorilla photography trek
Attend the park briefing and complete the trek. Hire a porter and follow all ranger instructions.
Return to the lodge for lunch, equipment care, backups, and rest.
Day 4: Optional conservation visit and Kigali
Visit the Ellen DeGeneres Campus, Twin Lakes, or another regional attraction before returning to Kigali.
Rwanda Gorilla Photography Itinerary: Five Days With Two Treks
Day 1: Kigali arrival
Airport collection and overnight.
Day 2: Transfer to Volcanoes
Private transfer with suitable photographic stops.
Day 3: First gorilla trek
Use the first trek to understand the conditions and create a mixture of portraits, behavior, and habitat photographs.
Day 4: Second gorilla trek
Apply what you learned on the previous day. Look for different compositions rather than repeating every frame.
Day 5: Return to Kigali
Visit a conservation or cultural attraction before departure.
Uganda Gorilla Photography Itinerary: Five Days
Day 1: Kigali to Bwindi
Travel across the Rwanda–Uganda border to the confirmed Bwindi sector. Border and vehicle documents must be arranged in advance.
Day 2: First gorilla trek
Attend the briefing and enter the forest with the authorized park team.
Day 3: Community or forest experience
Rest, back up photographs, and add a suitable community or nature activity.
Day 4: Second gorilla trek
Return for another photographic encounter.
Day 5: Bwindi to Kigali
Travel back to Kigali with sufficient time for border procedures and the international flight schedule.
The itinerary can also begin and end in Entebbe with road or domestic air transfers.
Ten-Day Rwanda and Uganda Gorilla Photography Safari
Day 1: Kigali arrival
Private airport transfer and equipment check.
Day 2: Kigali to Volcanoes National Park
Travel to Rwanda’s Virunga region.
Day 3: Rwanda gorilla trek
Photograph a habituated family in Volcanoes National Park.
Day 4: Golden monkey photography
Photograph golden monkeys or visit a conservation center.
Day 5: Volcanoes to Bwindi
Cross into Uganda and continue to the correctly booked Bwindi sector.
Day 6: Bwindi gorilla trek
Experience the contrasting forest and terrain.
Day 7: Rest and community experience
Back up images and explore responsibly with a local guide.
Day 8: Second Bwindi trek
Complete another gorilla photography session.
Day 9: Return to Kigali
Cross back into Rwanda and overnight in Kigali.
Day 10: Departure
Private airport transfer.
The route can be expanded with Queen Elizabeth National Park, Kibale, Akagera, or Lake Kivu.
Combining Gorillas With Other Wildlife Photography
Akagera National Park
Akagera adds savannah wildlife, landscapes, waterbirds, and boat-based photography to a Rwanda itinerary.
Potential subjects include: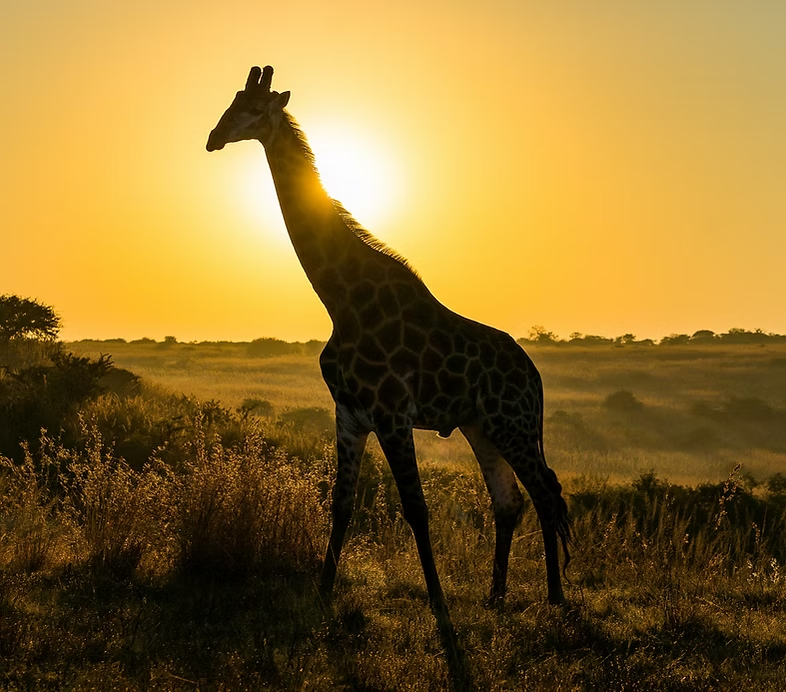
- Elephants
- Lions
- Rhinoceroses
- Buffaloes
- Giraffes
- Zebras
- Antelopes
- Hippos
- Crocodiles
- Birds
A private safari vehicle is recommended for photographers who want flexible positioning and sufficient equipment space.
Queen Elizabeth National Park
Uganda’s Queen Elizabeth National Park can add game drives, landscapes, birdlife, and the Kazinga Channel.
Kibale National Park
Kibale is widely known for chimpanzee tracking and primate diversity. Photography conditions differ from gorilla trekking because chimpanzees can be active in the canopy or move rapidly through the forest.
Murchison Falls National Park
Murchison Falls can provide wildlife, birding, river, and landscape photography within a longer Uganda itinerary.
Lake Mburo National Park
Lake Mburo can be useful as a shorter stop between southwestern Uganda and Entebbe or Kampala.
Editing Gorilla Photographs Responsibly
Post-processing should improve clarity while preserving a natural representation of the animal and habitat.
Useful adjustments
- Correct white balance
- Refine exposure
- Recover moderate shadow detail
- Control bright highlights
- Apply careful noise reduction
- Add selective contrast
- Crop for composition
- Correct minor lens issues
- Apply appropriate sharpening
Avoid excessive processing
Overprocessing can create:
- Unnatural fur texture
- Bright halos
- Artificial eye color
- Excessive saturation
- Unrealistic green vegetation
- Plastic-looking noise reduction
- Misleading removal of important environmental elements
Cropping
High-resolution files allow some cropping, but severe cropping reduces detail. Aim to compose well in the camera while respecting movement restrictions.
Removing distractions
Removing a small sensor spot is normal. Removing major habitat elements or combining several moments into one image should be disclosed when presenting the work as wildlife photography.
Common Gorilla Photography Mistakes
Bringing too much equipment
Heavy equipment increases fatigue and slows decision-making. Carry what you can use effectively.
Using a shutter speed that is too slow
The photograph may look sharp on the camera screen but reveal movement blur later. Maintain sufficient shutter speed.
Refusing to increase ISO
Excessively low ISO can cause blurred images in dark conditions. Modern cameras and editing tools handle moderate noise better than motion blur.
Focusing on leaves
Dense vegetation can distract autofocus. Use a controlled focus area and confirm focus on the eye.
Forgetting to disable flash
Check the camera and smartphone before trekking.
Changing lenses constantly
Repeated lens changes waste time and expose equipment to moisture and dust.
Photographing only close portraits
Include habitat, family behavior, hands, feeding, movement, and wide scenes.
Looking at every photograph
Continuous image review may cause you to miss important behavior. Check exposure and focus briefly, then return attention to the gorillas.
Ignoring the ranger
Park instructions are mandatory. A photograph never takes priority over safety or conservation.
Viewing the entire encounter through a screen
Pause occasionally and observe directly. The experience matters as much as the final files.
Gorilla Photography Frequently Asked Questions
Can I take photographs during gorilla trekking?
Yes. Still photography is permitted when visitors follow the park’s rules.
Is flash photography allowed?
No. Disable flash and autofocus-assist lights before entering the forest.
What is the best lens for gorilla photography?
A 70–200mm zoom is one of the most versatile choices. A 100–400mm provides additional reach, while a 24–70mm or 24–120mm is useful for environmental images.
Do I need a professional camera?
No. A familiar camera used carefully can produce meaningful photographs. Equipment knowledge, light, composition, and ethical behavior matter more than price alone.
Is a tripod useful?
A full tripod is usually impractical during a standard trek because of terrain, restricted movement, and limited time. Image stabilization and good handheld technique are normally more useful.
Can I use a monopod?
Ask the operator and park team. It may still be cumbersome in dense vegetation and should never interfere with other participants.
What shutter speed should I use?
Approximately 1/400 second is a useful starting point for a relatively still gorilla. Use a faster speed for active movement.
How high can I raise the ISO?
Use the ISO needed to maintain a sharp image. Test your camera beforehand to understand its acceptable range.
Should I photograph in RAW?
RAW is recommended because it provides greater control over exposure, white balance, and noise during editing.
Can I use animal eye autofocus?
Yes, but confirm that it is focusing on the gorilla rather than leaves or branches.
Can I fly a drone?
Do not assume drone use is permitted. Protected areas and national airspace have strict authorization requirements. Gorilla trekking should be photographed from the locations approved by park personnel.
Can I bring two cameras?
Yes, provided you can carry and operate them safely without disrupting the group. A porter can assist during the hike.
Can a porter carry camera equipment?
Yes, when properly arranged. Pack the equipment securely and explain how the bag should be handled.
Can children participate?
The standard minimum age for gorilla trekking in Rwanda and Uganda is 15. Confirm current rules before booking.
How long can I photograph the gorillas?
Standard visits normally allow one regulated hour after the family is located. Follow the park team’s timekeeping and instructions.
Is Uganda or Rwanda better for photographers?
Rwanda offers convenient access and excellent premium infrastructure. Uganda offers multiple trekking sectors, a lower standard permit price, and possible habituation experiences. Both can produce exceptional photographs.
Should I book more than one trek?
Two treks are recommended for serious photographers when budget and permit availability allow.
When should I book?
Reserve early, especially for dry-season dates, specific Bwindi sectors, multiple treks, and premium lodges.
Why Book With Universal Ventures Rwanda?
Universal Ventures Rwanda organizes private photographic safaris in Rwanda and Uganda. The itinerary can be tailored to the photographer’s equipment, experience, preferred accommodation, available time, and desired number of gorilla treks.
Services can include:
- Rwanda gorilla permit reservations
- Uganda gorilla permit reservations
- Gorilla habituation inquiries
- Private 4×4 safari vehicle
- Professional driver-guide
- Airport transfers
- Cross-border transportation
- Accommodation
- Porter coordination
- Golden monkey trekking
- Chimpanzee tracking
- Akagera photography safaris
- Queen Elizabeth National Park
- Kibale National Park
- Lake Kivu
- Kigali city experiences
- Customized photography itineraries
- Luxury, midrange, and comfortable budget options
- Solo and small-group safaris
- Operational support throughout the tour
Photographers should provide details about the number and size of camera bags when requesting a quotation. This helps the company select a vehicle with suitable seating, storage, charging possibilities, and window or roof access for the broader wildlife safari.
Plan Your Gorilla Photography Safari
A successful gorilla photograph depends on preparation, patience, ethical behavior, and the ability to respond calmly when a moment appears.
Learn your camera before traveling. Choose a flexible lens, protect the equipment from rain, use a fast enough shutter speed, and accept that high ISO may be necessary. Disable flash before the trek and listen carefully to the park team.
Most importantly, remember that the gorillas are not posing for a planned photo session. They are wild animals living within protected forest habitats. The strongest images come from observing their natural behavior without attempting to influence it.
This Gorilla Safari Photography Guide Rwanda and Uganda can help you prepare technically, but local expertise remains essential. Permit dates, trekking sectors, accommodation, road transfers, equipment needs, and additional wildlife destinations should be coordinated as one complete itinerary.
Book a Gorilla Photography Safari With Universal Ventures Rwanda
For customized gorilla photography tours, permits, private transportation, accommodation, and Rwanda–Uganda safari planning, contact:
Universal Ventures Rwanda
Telephone/WhatsApp: +250 781 441 853
Email: info@universalventuresrwanda.com
Address: KK 15 Road, opposite the IPRC main entrance, BGRD Building, Kigali, Rwanda
Website: www.universalventuresrwanda.com
